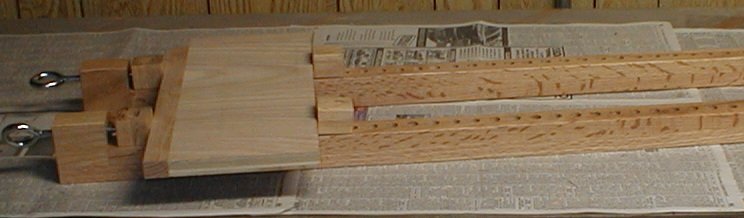
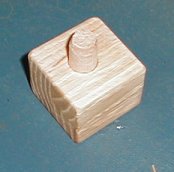
Bar clamps
Here are the bar-clamps I made from some scrap oak...but you'll need to accumulate a pile of
long scraps...depending on the length of clamps you need ;)
The inspiration for these bar clamps came from
Woodsmith #108. However, there were some things I didn't like in the design, fabrication and hardware:
- The design had an end-grain to long-grain glue joint in a critical spot
- It required a 2 1/4" hole drilled at a precisely perpendicular orientation - and I don't have a drill press
- Hardware required a threaded plastic knob, which can
be hard to find and expensive. It is glued onto the end of a bolt,
which could easily loosen with hard use.
My design addresses these issues by:
- Inverting a piece resulting in a long-grain to long-grain glue joint
- Using a groove cut on the table saw...pretty much guaranteeing a perfectly aligned clamp screw
- Substituting an eye bolt for the hex bolt/threaded
handle - besides being cheaper and easier to find...they make nice
hanging hooks!
Most of the changes are in what I call the 'headstock' of the clamp -
the part where clamp is adjusted. The rest of the clamp is identical to
the WoodSmith plans. I had immediate need for a 36" clamp...so I
made this set ~40" long. All parts are 1 1/2" wide.
Here are part measurements:
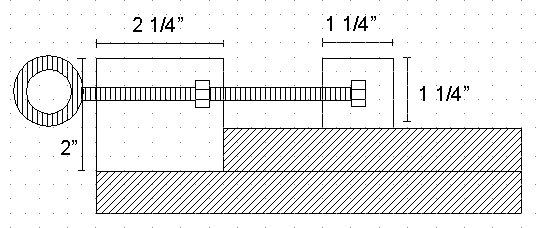
A picture is worth a thousand words...maybe more if I had to explain how this all fits together:
Stock (all 3/4 thickness):
(2) headstock: 2 x 2 1/4"
(2) clamp pad: 1 1/4 x 1 1/2"
(2) moveable stop: 1 1/2 x 1 1/2"
(1) stop peg: 1 1/2" x 1/2" dia dowel
(1) bar top: 1 1/2" x (desired length + 6")
(1) bar base: 1 1/2" x (desired length + 3 3/4")
Hardware:
(1) 6" eye-bolt (3/8") and nut
(1) 3/8" locknut
(1) 3/4" washer
(2) 3/8"id x 7/16"od x 1/2" long nylon spacer
Construction procedure:
1. I recommend
getting scraps long enough to cut several pieces at once - cutting
dados on small parts can be tricky, at best. For the headstock parts, I
started with two pieces each 2" wide by 11" long. This will make
headstock parts for 4 clamps. For the clamp-pad, I started with a 1
1/2" wide by 14" long, which also makes parts for 4 clamps.
2. Setup for a dado cut on the TS: 1/2" wide, 3/8" from the fence, 1/4" deep.
3.
Run the headstock parts through once. Run the clamp-pad parts
through twice - the second time, rotate the piece so the opposite side
is against the fence.
4. Cut the parts to length.
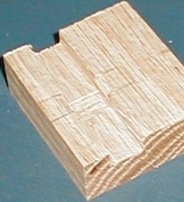
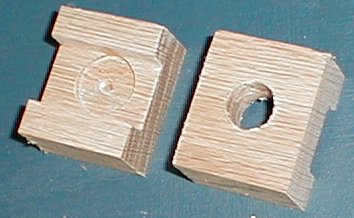
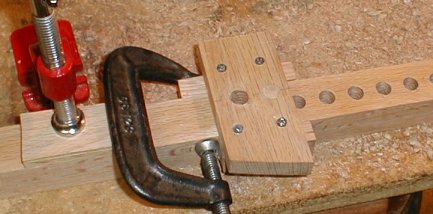
You should have something like these:

| 5. Cut one of the nylon
spacers in half. A short spacer will be at the front of the
headstock...a longer one (uncut) at the back: |
 |
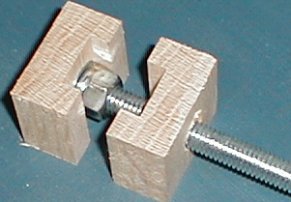
6. Place the standard nut in between the spacers and mark it's location.
NOTE: I recommend positioning the nut very close to the shorter spacer
(the front of the headstock). Unless you are lucky enough to find eye
bolts that are threaded on the full length, this will increase the
amount of clamp travel.
|
|
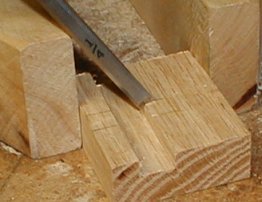
| 7. Next, the nut needs to be
'carved' into the groove. It's pretty easy - take a little off the
corners and a little off the bottom of the groove with a 1/4" chisel. |
|
|
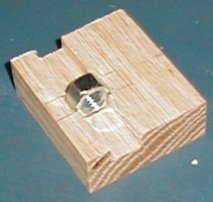
8. Repeat the procedure on the matching part and ensure the nut fits snugly between the parts.
|
|
9. Once it fits snugly you can glue up the headstock with all the parts in place:
|
|
10. Of course, you should check the final fit with the eye bolt prior to glueing ;)
|

|
11. Now you can glue it in place on the end of the bar.
For added strength, two screws can be driven from the bottom of the bar
into the headstock. For maximum effect, they should be placed at
the front edge of the headstock.
|
|
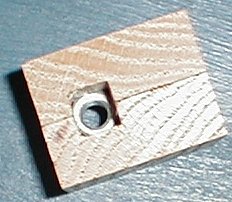
12.
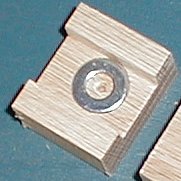
Next we begin constructing the clamp pad. First step is a 7/16" hole in
one half and a 3/4" hole in the other half, deep enough to hold the
washer.
|
|
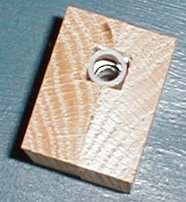
13.
Insert the remaining half of the nylon spacer into the through hole.
Carefully push the eye bolt through the spacer and put the locknut on
the end of the bolt. Dry-assemble and check the fit to ensure the
locknut strikes the washer evenly.
note: The purpose of the washer is to give the nut something to ride
against to distribute the pressure when the clamp is tightened.
|
|
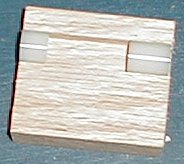
| 14. Glue the washer in place...I recommend epoxy. |
 |
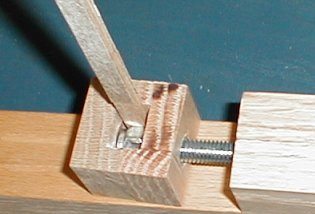
15.
Once assembled, the tight space in the clamp pad will make it difficult
to hold the nut when threading the locking nylon part over the bolt.
Use a small shim to keep it from turning.
|
|
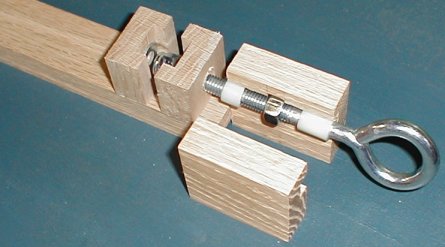
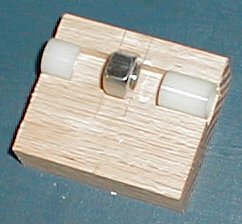
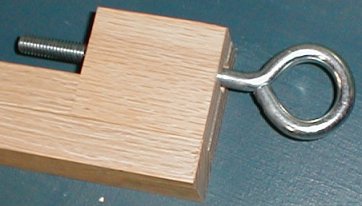
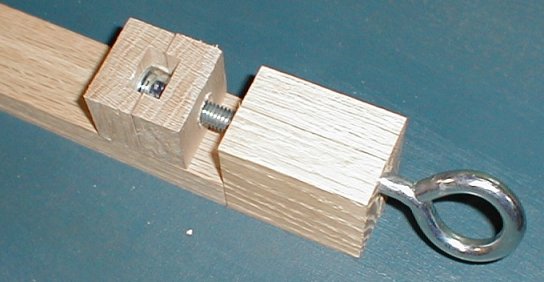
16. Here's the completed headstock assembly
|
 |
17.
The moveable stop parts are simply face glued together. Drill a
1/2" dia hole 3/4" deep and glue the dowel peg into place.
|
|
18. The last assembly step is to drill the bar holes for the moveable stop.
I used a simple guide to keep the holes evenly spaced.
|
|
19.
While shop clamps hardly require a fancy finish, I prefer to avoid
stains and prevent warpage. I finished with two coats of shellac.
|
|
