Simple Router Table
|
For
the past year, I have been planning to build a new router table.
Currently, my router table is built into the extension wing of my table
saw (see picture at right). In my previous house, my shop was about 10'x12' - so space was at
a premium. The tablesaw extension wing was my only choice. Now that I have a little
more room, there are other options. Over my past few projects I have
discovered that the router table is the second most frequently used
tool in my shop. Number one is, of course, the tablesaw. Besides the
constant conflict between the two tools, the extension wing has sagged
over the years. Additionally, the router table fence I built has
warped. Having little knowledge of wood movement when I built the
fence, I foolishly followed some fancy plans and built the fence from
hardwood...instead of something more stable (plywood, MDF, etc). |
the old router table
|
Over the past year I have researched router
table designs - including many published designs and a few designs of
my own. Most of them are fairly complex and would constitute a
significant project. I have a list of projects that are higher on the
priority list...yet I need a better router table before tackling them. While reading a highly recommended book, The Router Joinery Workshop
(by Carol Reed), I came across a very simple router table design that
appealed to me. Ms Reeds justifications for her design decisions seemed
to go against the common wisdom yet made perfect sense to me. Given her
qualifications as author, woodworker and teacher, I decided that her
design would make an excellent intermediate step between my current
solution and the 'ultimate' router table.
Additionally, the construction would take less than a weekend...which
means it will minimally affect the schedule of my other projects.
Ms Reeds design has a number of feature which appeals to me:
- Small and portable
- Easy to build
- Inexpensive
- Clamping surface for handheld operation
- Horizontal routing setup
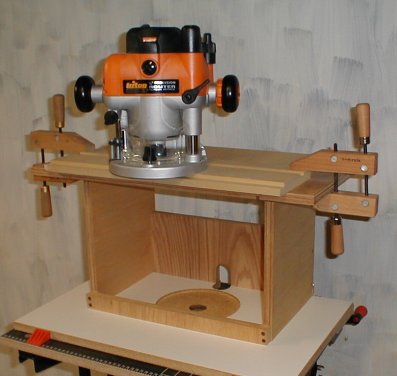
Here is the completed table, shown with my Triton router installed:
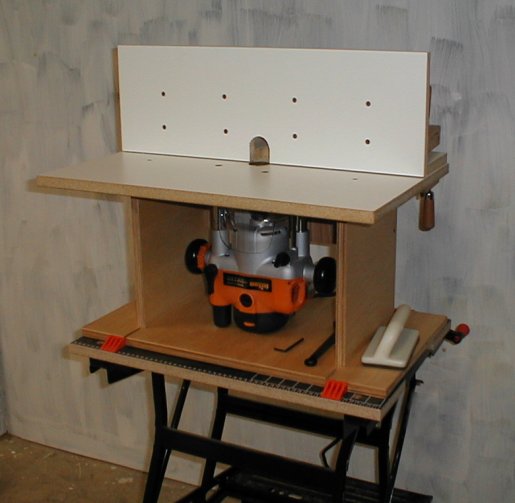
It is installed on a B&D
Workmate 225, which I also use with my bench grinder, belt/disk sander
and miter box. At the taller workmate configuration, it results in a
worksurface at 43". This is considerably higher the height of my
workbench or tablesaw (35-36"). I find this a more comfortable height
for most router work (I am average height - 5'10"). The workmate also
has a shorter configuration, which lowers the work surface about 6".
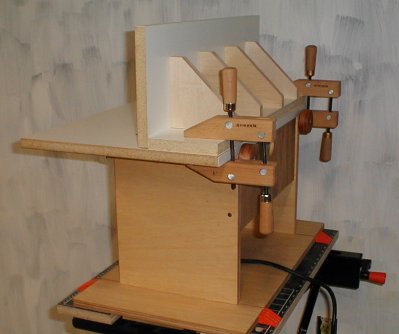
You can see the backside and fence construction from this angle, as
well as my simple (but effective) fence clamps. At first, this was a
temporary solution prior to implementing the fence pivot/clamping
system described by Ms Reed. But after using it a few times, I like the
clamps...so until I find a compelling reason to change, the clamps will
stay. You can also see a 1/16" space under the front face of the fence
to prevent dust accumulation from affecting routing operations.
|
One of my favorite
features of the Triton router is the above-the-table single wrench bit
changes. To get enough of the collet exposed, I routed a 1/4" recess
into the underside of the table surface to fit the router base.
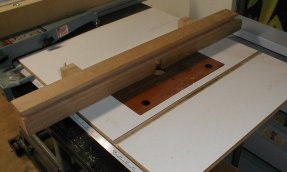
|
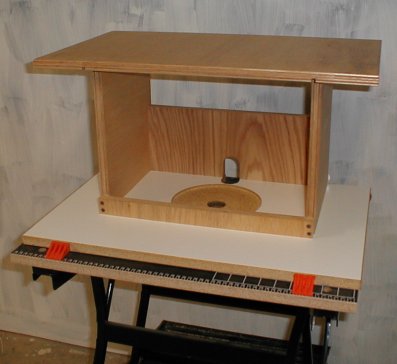
Flipped over, you can see the recess for the router base, as well as
the two top supports that span the distance between the sides.
|
In this position, the table makes a convenient work surface for handheld routing of small to medium pieces.
|
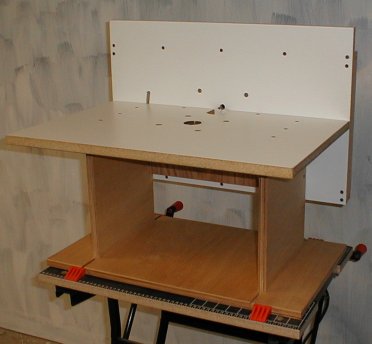
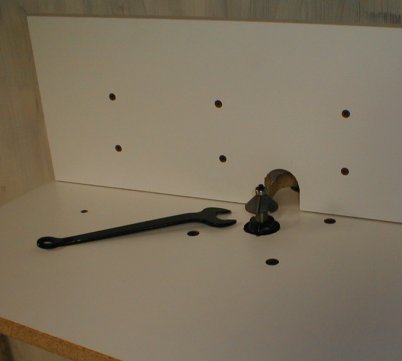
With an alternate fence installed, this router table can be used in a
horizontal configuration. The fence surface references the top and two
side supports to maintain a perpendicular orientation. The fence pivots
to adjust the position of the router bit above the table surface. Studs
mounted in the back of the table sides (hanger bolts) protrude through
the
vertical fence, which is secured in place with a pair of nuts.
|
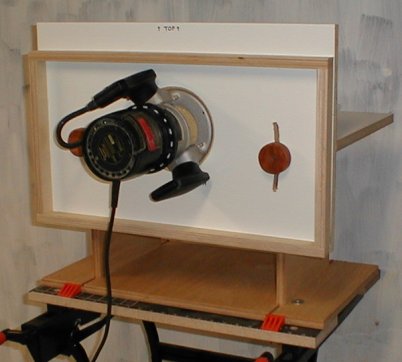
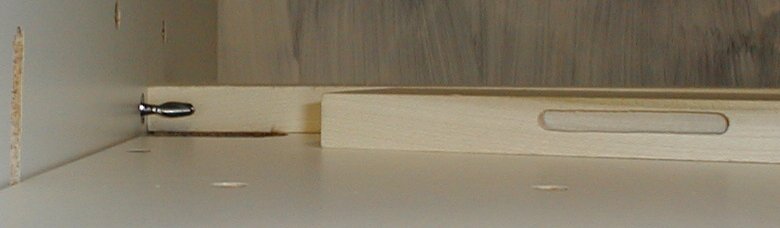
From the back you can see the mounting mechanism. There are two
attachment points, a hole on the left and a curved groove on the right.
You can see my old Craftsman router which as been reduced to only
mortising operations.
|
Here is a mortising bit installed - a setup block would be quite handy
for setting the bit height. A sample mortise is visible on the right.
|
Because I made some changes to Ms Reeds design, I have documented the project here. So if you happen to be familiar with her
design, my changes are as follows:
- Added an overhang on the base to facilitate clamping around all edges. I increased the overhang on the back
to 2 inches to match the front side.
- Increased the distance between the rails to
accomodate the width of the Triton router handles. Obviously, this
detail is highly udependent on the router you will be using.
- Shortened the side supports. The lower height allows the router to be de-plunged
onto the bottom surrface when not in use...which removes the weight
from the table surface and lowering the chance of a sagging surface.
- Added an additional support under the top surface between the side rails.
- Increased the height of the fence...just because I wanted to.
- Substituted 3/4" melamine for 3/8" acrylic as
the primary table surface. I could not locate 3/8" acrylic at the local
hardware stores...and a custom order from a glass shop would have been
very expensive. While wandering the aisles in frustration, I noticed a
16" wide pre-fab melamine shelf - 8ft for $14. Half of the shelf is
enough for the table surface and fence.
- Substituted
3/4" melamine for 1/4" aluminum on the vertical fence. Since the router
hanging horizontally puts considerable stress on the fence, I added a 1
1/2" plywood apron to add stiffness. Only time will tell if this is
sufficient. When not in use, I remove the router and store the fence on
end.
More details (including detailed drawings) coming soon...
|