| topics |
| back
to shop |
| home email me |
| sawdust:
projects |
||||
|
Dovetails
on the bandsaw
4 Oct 2010 Dovetails on the Bandsaw, Scroll Saw and Router Table
Summary: This is my method for cutting regular and symmetric dovetails
using
the bandsaw, scroll saw and router table. The bandsaw is used to cut
kerfs for the pins and tail for a perfect fit. The scroll saw is used
to quickly remove most of the waste and router table is used to remove
the remaining waste and fine-tune the depth of pins and tails.
There is a tiny amount of manual cleanup on the tails - probably not
enough to call them hand-cut, though. You could, of course, remove the
waste manually with a mallet and chisel instead of using the scroll
saw...or use a coping
saw or bandsaw. Using the router table to trim the final
depth of pins and tails is both quick and accurate, but it also imposes
a minimum spacing between adjacent pins and tails of 1/2" (the width of
the bit). I use this method wherever possible and fall back to mallet
and chisel when the spacing precludes use of the router table. |
| This method can only
produce through dovetails joints. It cannot be used to make half-blind
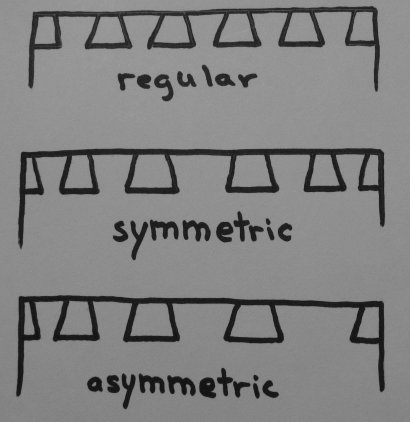
or full-blind dovetails. There are basically three types of through dovetail geometries, which I refer to as regular, symmetric and asymmetric: Regular - Each tail is the same size and each pin is the same size, excluding the two pins on the ends (which are typically smaller than the other pins). Symmetric - Tail and/or pin sizes vary from one to the next, but if you split either board down the middle, each side is a mirror image of the other. In the example on the right, the two outermost tails are the same size and the next two inner tails are also equally sized. Pins follow the same rule. Asymmetric - Anything goes here. If it isn't one of the above, then it is asymmetric. |
 |
This method can easily produce both regular and symmetric dovetail joints. In theory, I think it can also be used to produce asymmetric joints, but this requires some extra steps that I will not cover in this article.
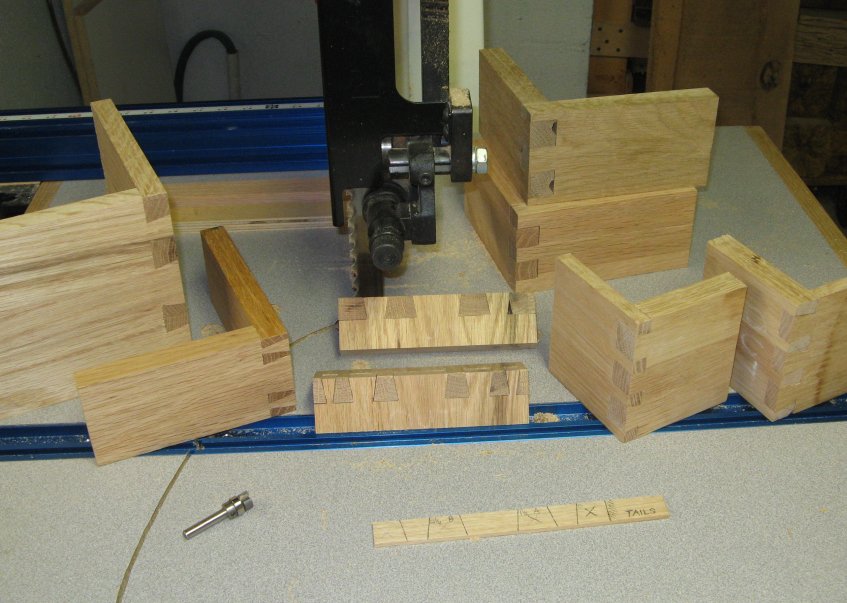
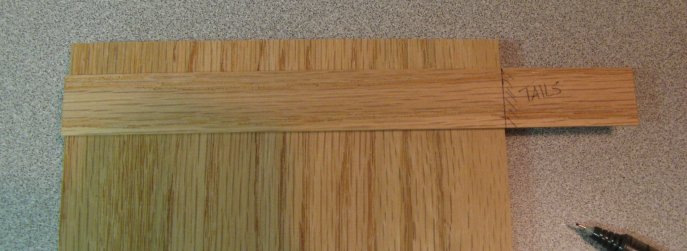
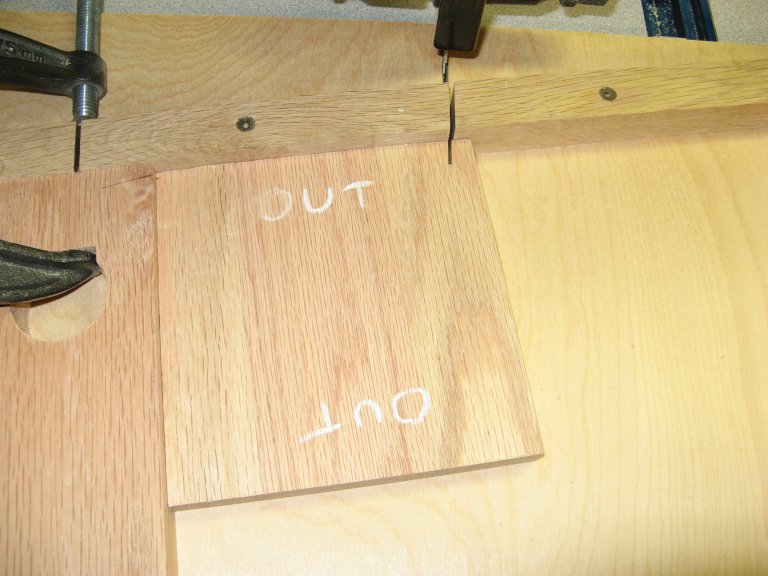
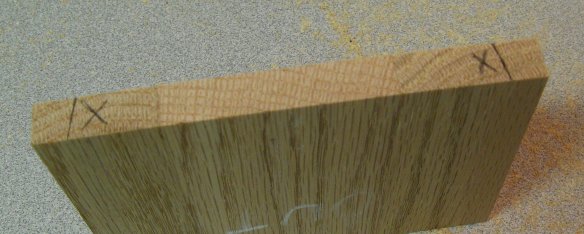
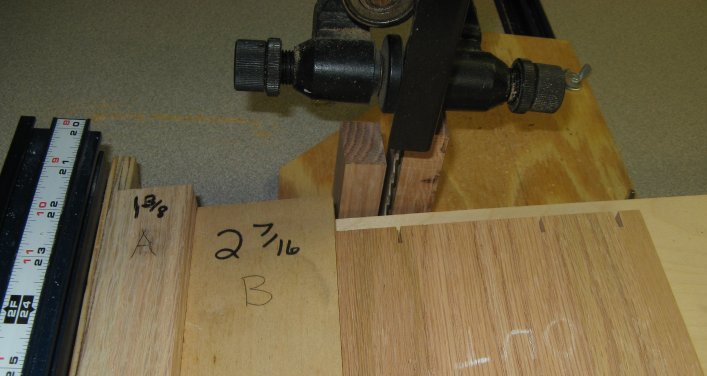
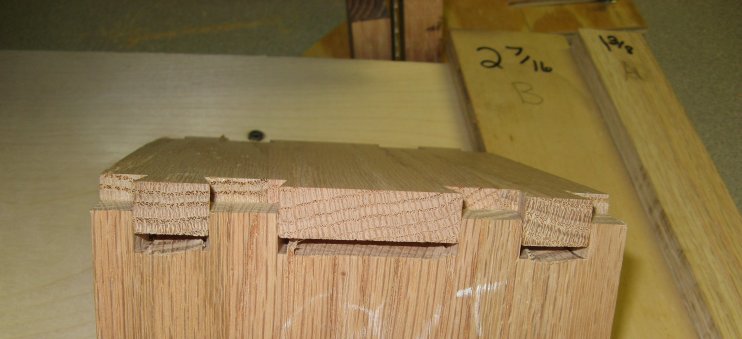
Stock Thickness: This method works well with a wide variety of stock thicknesses. So far, I've tried 1/2" - 1" with equal success. In theory, dovetail joints in much thicker stock can be cut on the bandsaw with equal ease, though the assistance of the scroll saw and router table will be limited. In addition, it works well for joining to pieces of different thicknesses. In the picture at the beginning of this article, in the lower right corner, you can see examples joining 3/8" to 13/16" stock - one uses thicker stock for the tails, the other for the pins. To do this, simply set the depth-of-cut at the bandsaw and router table using the opposite stock of the one being cut. For instance, when cutting tails using thicker stock, set the stop using the thinner stock. When trimming tails in thinner stock on the router table, set the router bit height using the thicker stock.The Tail Sled
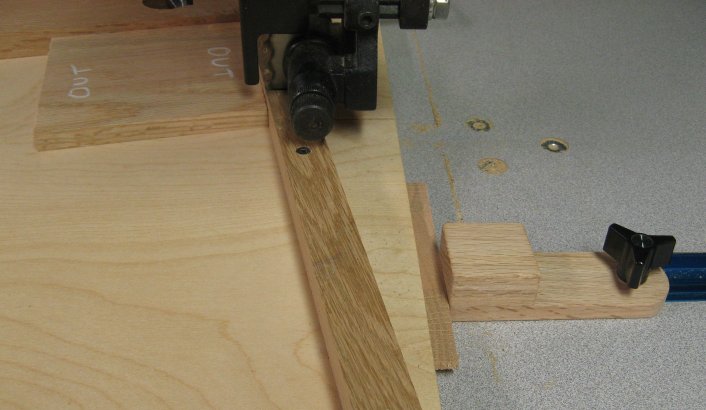
The sled for cutting the tails is quite simple. It rides in the miter slot and has a fence at the front. The fence is angled to match the desired angle of the tails. There is a secondary adjustable fence that is perpendicular (90 degrees) to the angled fence on the sled.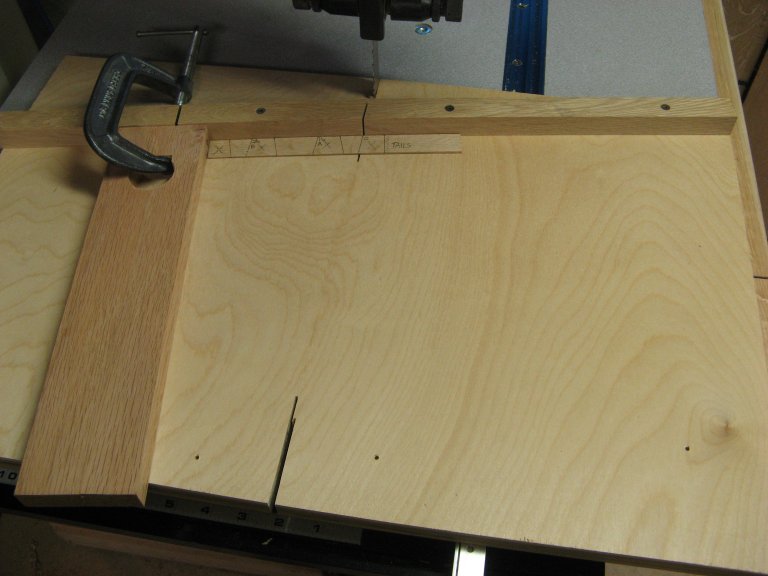
Pin Sled
The sled for the pins is only slightly more complicated. It supports a bed that sits at an angle to the bandsaw table - the same angle as the fence on the tail sled. It has a ledge at the bottom to support the workpiece. It could be clamped directly to the table, but I found that mounting it to the bandsaw fence saved a lot of time when fine-tuning the pins, since it keeps the sled parallel with the blade and makes small adjustments easier. If your bandsaw table tilts both directions (mine does), you could use a flat sled for this and tilt the table instead. If you are doing narrow work and have a fence that travels the full width of your table, you might even be able to use the table and fence without a sled. The sled was easy to build, so I took this approach and it has worked out very well.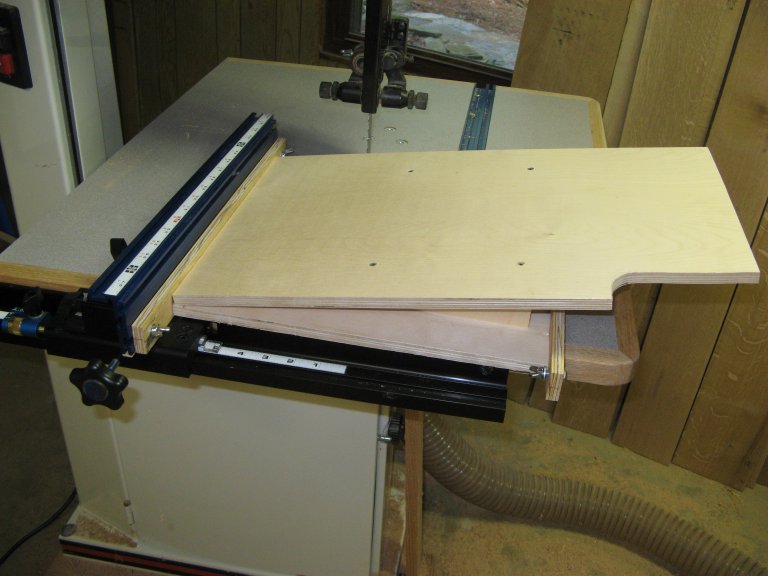
I used 10 degrees for my sleds, but they could be built to produce any angle - even adjustable sleds would not be hard.
Layout
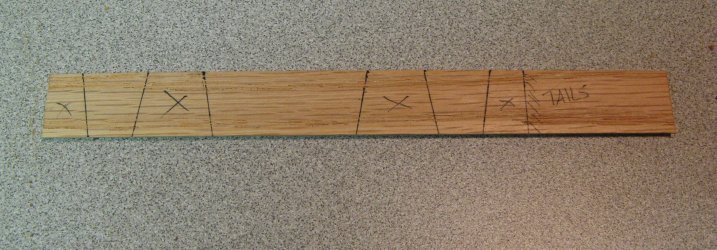
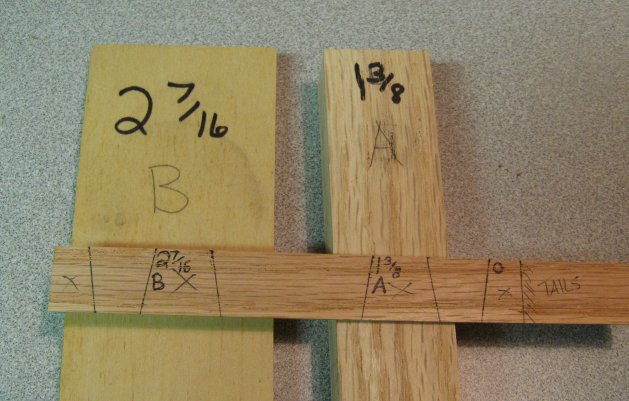
Laying out the dovetails is very easy with this technique. Because the pins are marked directly from the tails after the they are cut - only the tails need to be layed out. And the best part is that it need only be done once for a given stock size and arrangement. If you are producing 2 identical drawers or 20, you still only mark the tails once.I use a story stick marked to match my stock width:
Next, layout the tails and mark the waste:
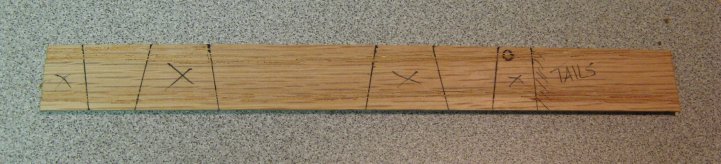
Now mark the right-most edge of the right-most tail with a zero (my left-right directions should be reversed if you build your tail sled with the fence angled the opposite direction):
Now measure from the right edge of that tail to the right edge of the next tail to the left and mark it. Then measure from that tail to the next and mark it. Continue until all tails are marked:
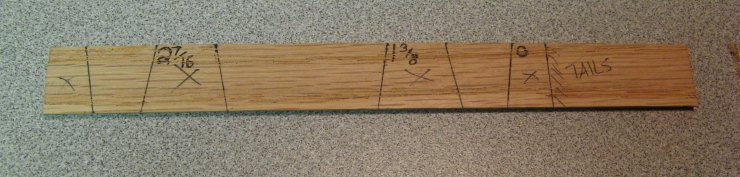
Finally, starting after right-most tail, label each successive tail A, B, C, etc, moving from right to left:
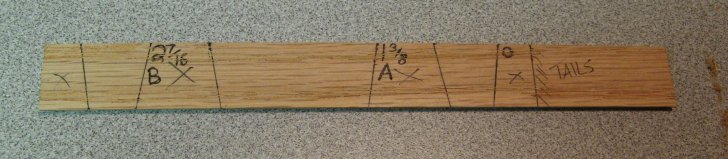
Finally, create spacers for each label (A, B, etc). It is critical to label them in the correct order to prevent mistakes during the cutting steps. You will note that I mark the letters in pencil for each project, but mark width in permanent maker for future re-use - I can usually find the spacers I need in my box from previous projects.
Cutting the tails
Cutting the kerfs for the tails is now quite simple. First, position the adjustable fence to cut away the waste edge of the first tail: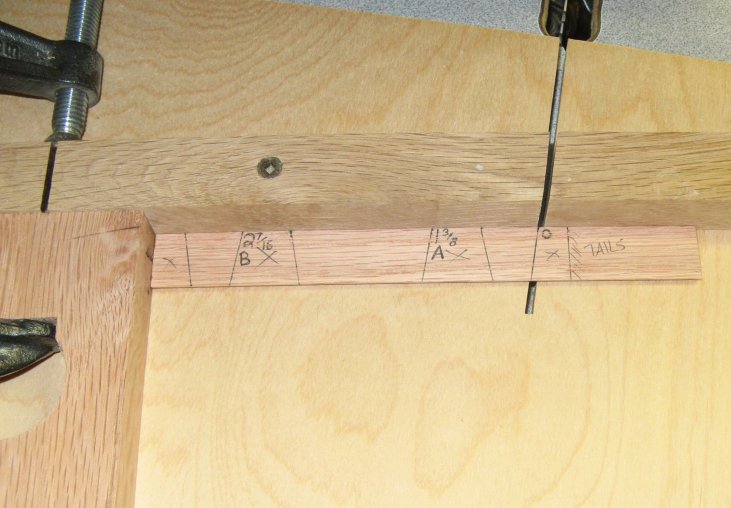
Next, set a stop for the sled to limit the depth of cut. You could, of course, mark the depth and cut to the line, but using a stop is faster and will yield more consisten results.
- Move the sled in until a tooth contacts the workpiece
- Put a scrap from the project stock, which exactly matches the thickness of the parts, against the sled
- Position the stop against the scrap and lock down
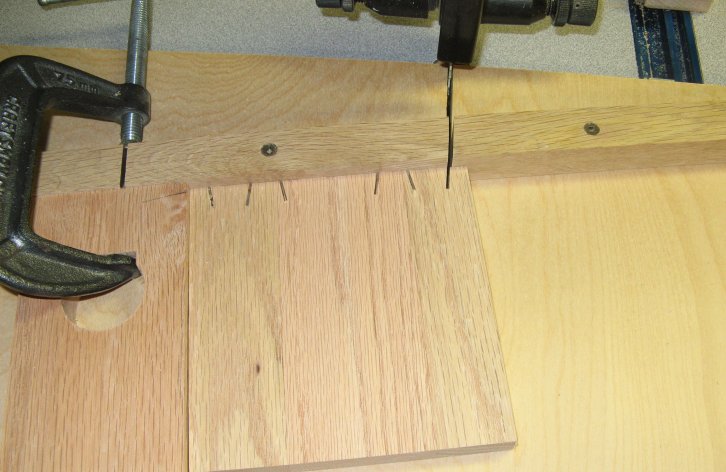
Finally, cut the tails:
- Put the workpiece against the forward and adjustable fences
- Cut the first kerf
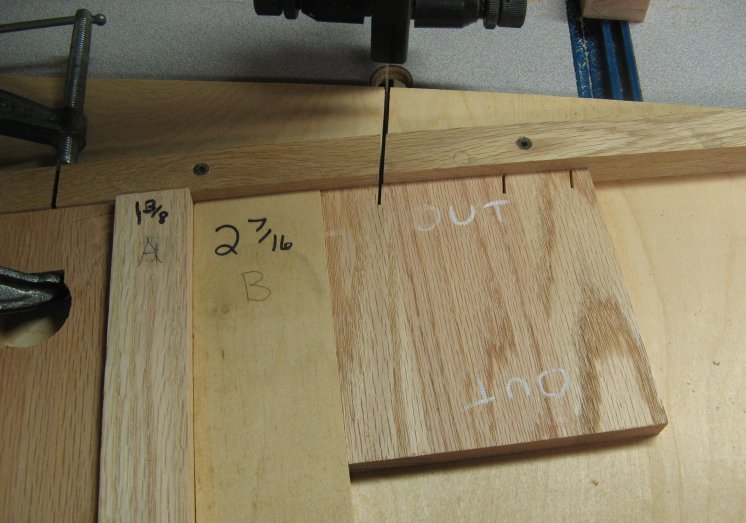
- Add spacer A between the stock and the adjustable fence and cut next kerf
- Repeat, adding each spacer in order
The result after I've cut all three tails:
Now flip the workpiece over (left-to-right) and repeat the previous process, but remove (instead of adding) spacers in the reverse order. The results should look like this:
Cleaning up the Tails
Once the tails are cut, the waste between the tails can be removed using a variety of techniques, including the traditional mallet and chisel. I found that I could use my scrollsaw to quickly remove most of the waste and then turn to a bearing-guided bit on the router table to quickly and accurately remove nearly all of the remaining waste and fine-tune the depth of the tails.I start by cutting just shy of the final depth (by ~1/8") on the scrollsaw. I use Flying Dutchman blades and they make quick work of the rough cleanup - even in thick oak.
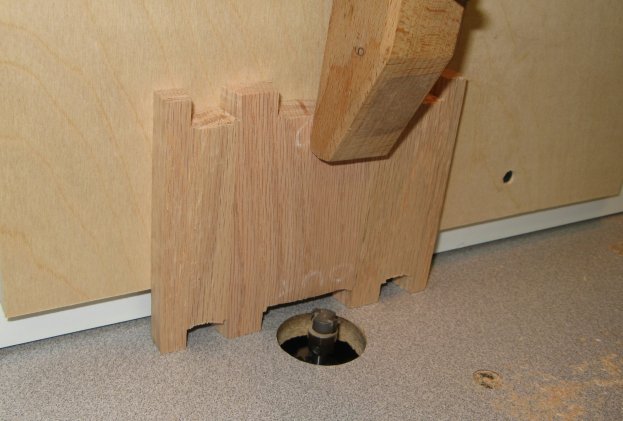
Next I move to the the router table and set a bearing guided pattern bit (see details in the Requirements section) to match my stock thickness:
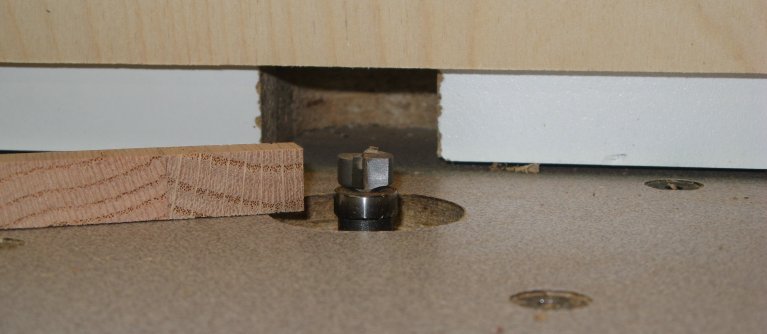
Next I mount the workpiece, tails-down, on an sled that holds the workpiece perpendicular to the table. Note that the bit must pass completely through the workpiece, so you must allow for that in your design. The fence on my router table happens to be deep and heavy enough to provide stability when moving the entire assembly over the bit, so I simply attach a spacer to the fence and clamp the workpiece to that:
| The moveable
offset-face fence at the right allows the bit to pass completely
between the tails while keeping the workpiece stable and perpendicular
to the table. |
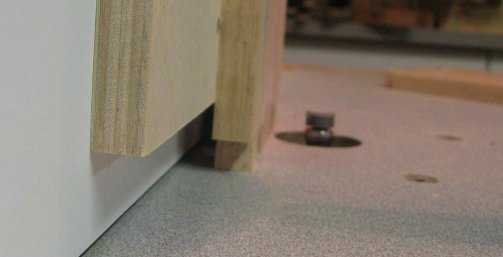 |
The bearing is used to guide the workpiece around the bit using the tails as a guide. This step removes most of the remaining waste and ensures a consistent tail depth. Fine tuning the depth is quick and accurate using this method.
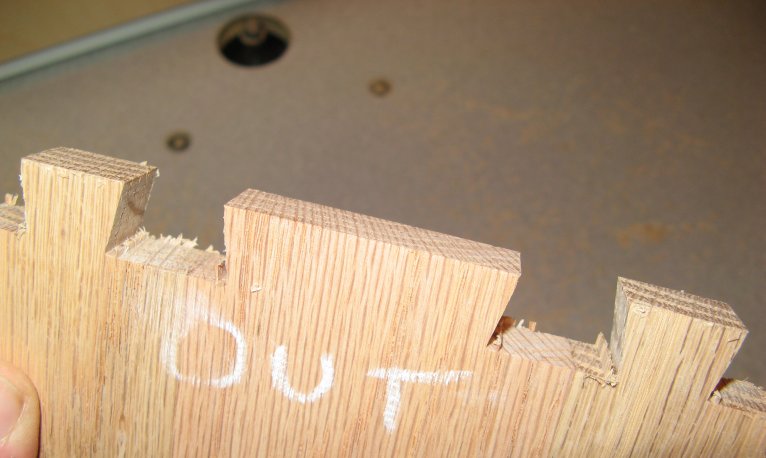
The result is tails that are all cut to an identical depth. Because of the angle of the tails, this does live a tiny bit of cleanup, which I tackle with mallet and chisel. You can see the lines of uncut wood in each corner of the tails in this picture:
After some quick work with a chisel or knife, the tails are done:

Cutting the Pins
I follow these steps to cut the pins:- Cut first side of pins
- Cut second sides of each pin, leaving them a little wide
- Remove most of the waste between the pins
- Fine-tune the pin width
- Cut the pins to final depth
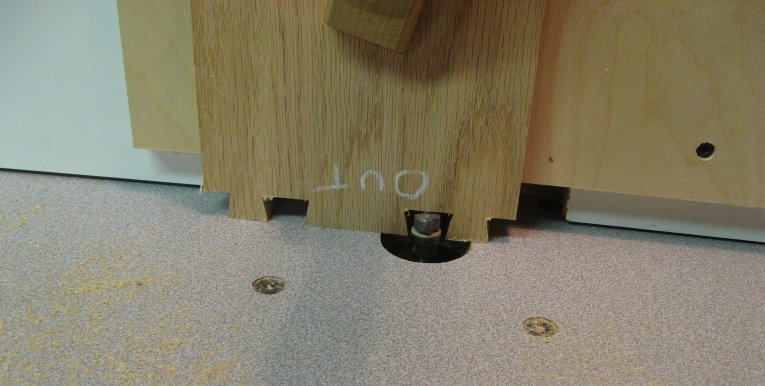
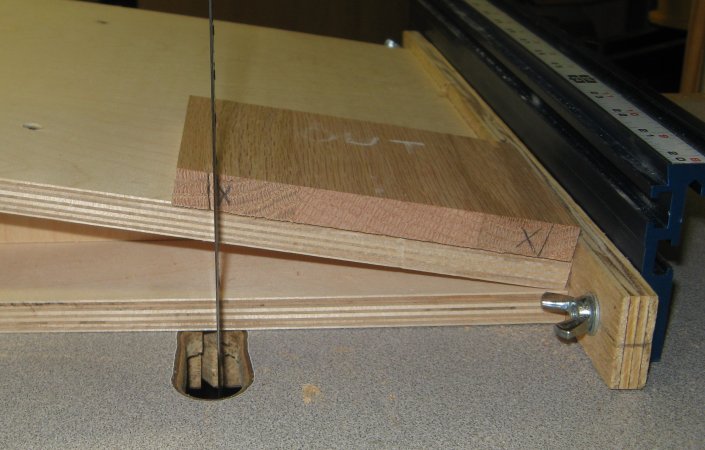
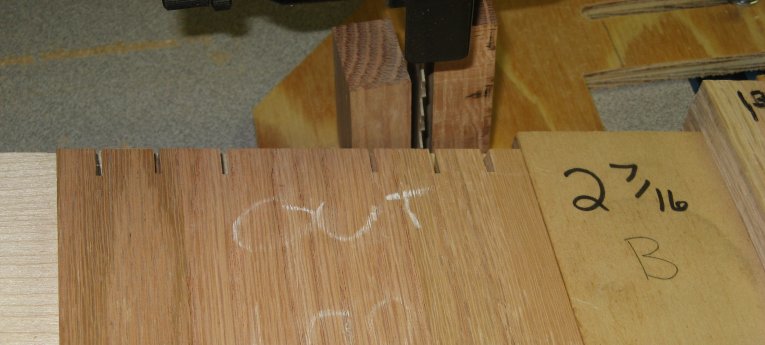
Next, position the pin sled for a cut just on the waste side of the line. Be sure that the sled is positioned so that the workpiece can move in a path perfectly parallel to the blade. On my sled, the workpiece slides along the lower ledge (right side in the picture below) which is attached to my bandsaw fence. Note that the outside face should be up during all pin cuts (see my chalk markings in the picture).
Next I like to set a stop to control the depth-of-cut, again using a scrap from the workpieces. An alternative would be to mark the depth on the workpieces. Because I use the router table to fine-tune the final depth of the pins, I leave the depth-of-cut a bit short here (note the space between the blade and test pieces).
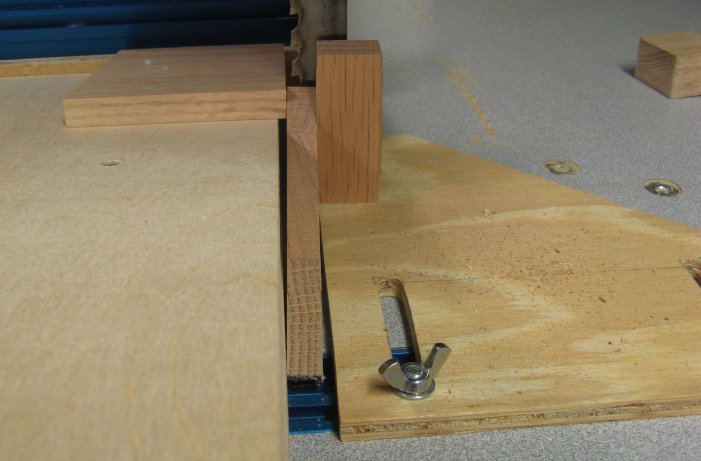
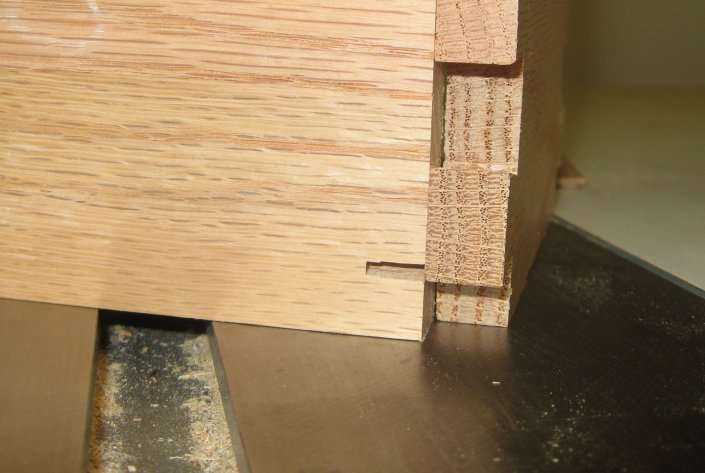
Next, make the first cut. Note that when cutting the tails, the entire sled moves. When cutting the pins, the sled is stationary - the workpiece slides along the bottom stop on the sled (which I suppose makes this a fixture, not a sled). After making the first pin cut, check the placement against a tail piece, as pictured below. If needed, adjust the sled and trim the pin as needed.
Once the sled is adjusted to get the first pin sized correctly, make the remaining pin cuts using the spacers:
One side of each pin is now complete:

Next, turn the sled around and again position it to cut on the waste side of the line on the test piece. Be extra conservative here - if you cut over the line, your tails will be too loose! Fine-tuning of the pin width comes later. Using the spacers, cut the other side of each pin on the test piece:
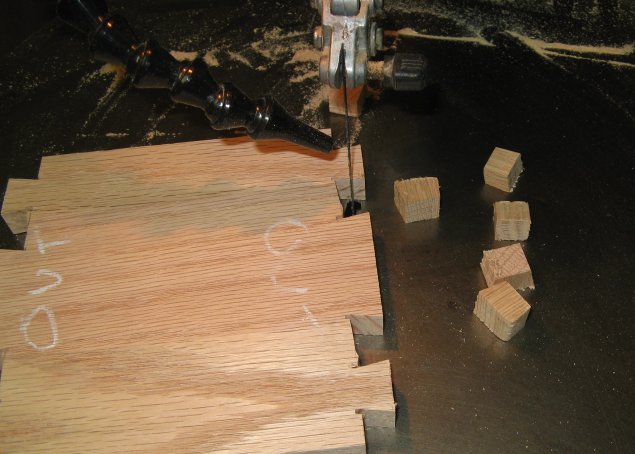
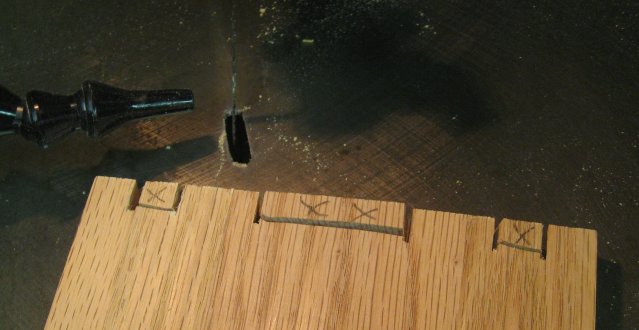
In order to test the fit of the pins on the test piece, most of the waste should be removed. Again I turn to the scrollsaw. I start by turning the workpieces over - so the inside face is up . Then I mark each waste section. The marks are not strictly necessary, but they greatly reduce the possibility of accidentally cutting off a pin. Trust me :) Next I tilt the scrollsaw table at an angle to match the angle on the pins/tails and the cut most of the way through each waste section:
Tilt the table the other direction and complete each cut by entering from the other side of each waste section:
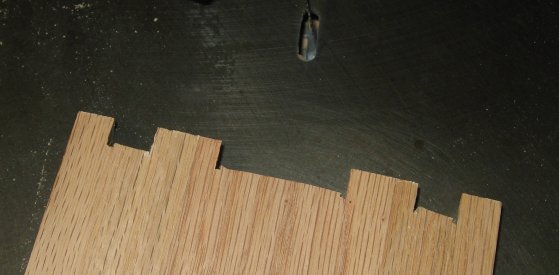
You can now check the fit of the pins on the test piece
The pins on your test peice should not fit perfectly the first time. Go back to the bandsaw and move the sled a tiny amount, trim each pin (using all the spacers) and then re-check the fit. I usually adjust about 0.05" at a time, roughly the thickness of a sheet of paper. Go slowly! You only need to do this once, for the test piece. When the fit is perfect, cut the other side of the pins on all the workpieces:

Next, remove most of the waste using the same method used to remove the waste on the test piece. While not strictly necessary, I can never resist checking the fit of each box or drawer at this point:
With the pin width now perfect, we can clean out the remaining waste and fine-tune the pin depth using the same method we used for the tails:
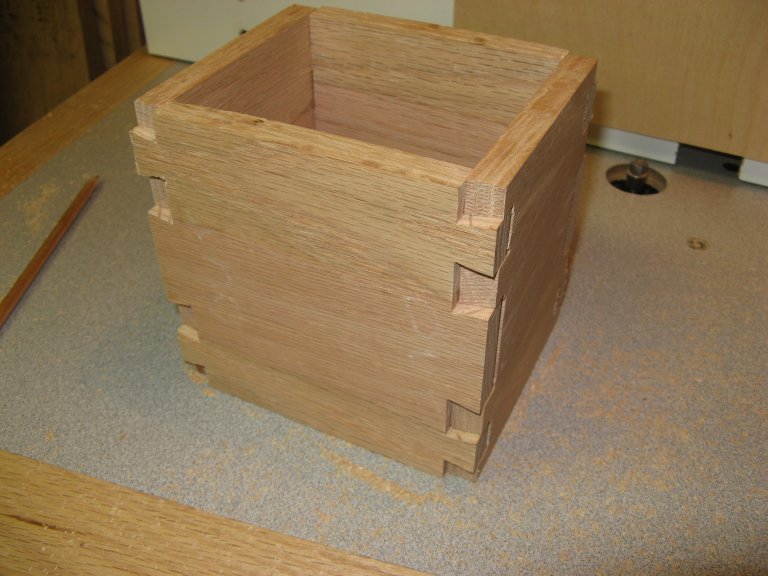
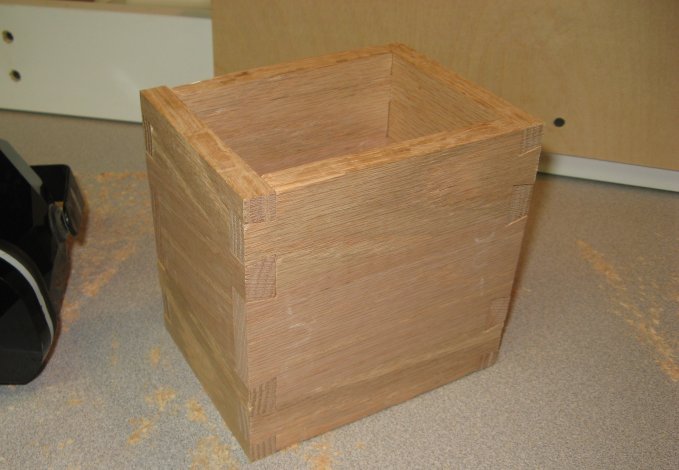
Now, put it all together:
I hope this has been helpful for you. If you try out this method, I'd love to hear how it worked out for you and any improvements you have found. Please E-mail your comments or questions!
